Introducing: Custom Checkout Forms on Selar 🎉
We know this has been long overdue, and we’re excited to finally bring it to you! Say goodbye to collecting only emails and phone numbers at checkout. Now, you can gather all the essential details you need with Custom Checkout Forms on Selar!
As a creator, understanding your customers is key to delivering the best experience in using your product. With this new feature, you can now seamlessly collect important information before a purchase is completed. You can also personalize your offerings, manage customer requests more efficiently, and have more control over the entire sales process. With custom checkout forms, you can:
1. Customize questions to fit your needs
You can now ask any question and choose from multiple response types:
- One-line text – perfect for short responses.
- Multiple-line text – great for detailed answers.
- Radio buttons – ideal for single-choice questions.
- Checkboxes – allow customers to select multiple options.
- Dropdown selections – keep responses structured and easy to navigate.
2. Implement across all products
This feature is available across all Selar products and applies to all product types—courses, subscriptions, services, and digital products.
3. Manage Responses Effortlessly
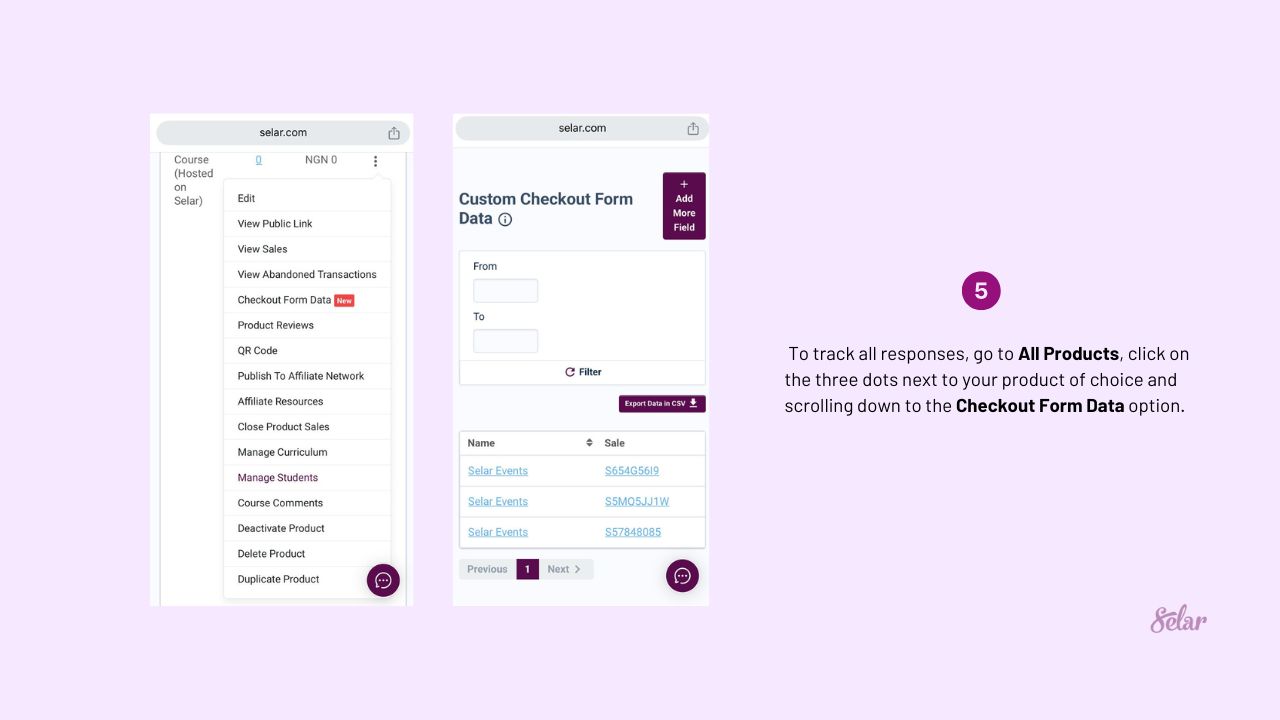
All collected responses are stored in the Checkout Form Data page, where you can review and manage customer inputs in one place. Plus, you can edit your forms anytime to ensure flexibility as your business evolves.
How it works
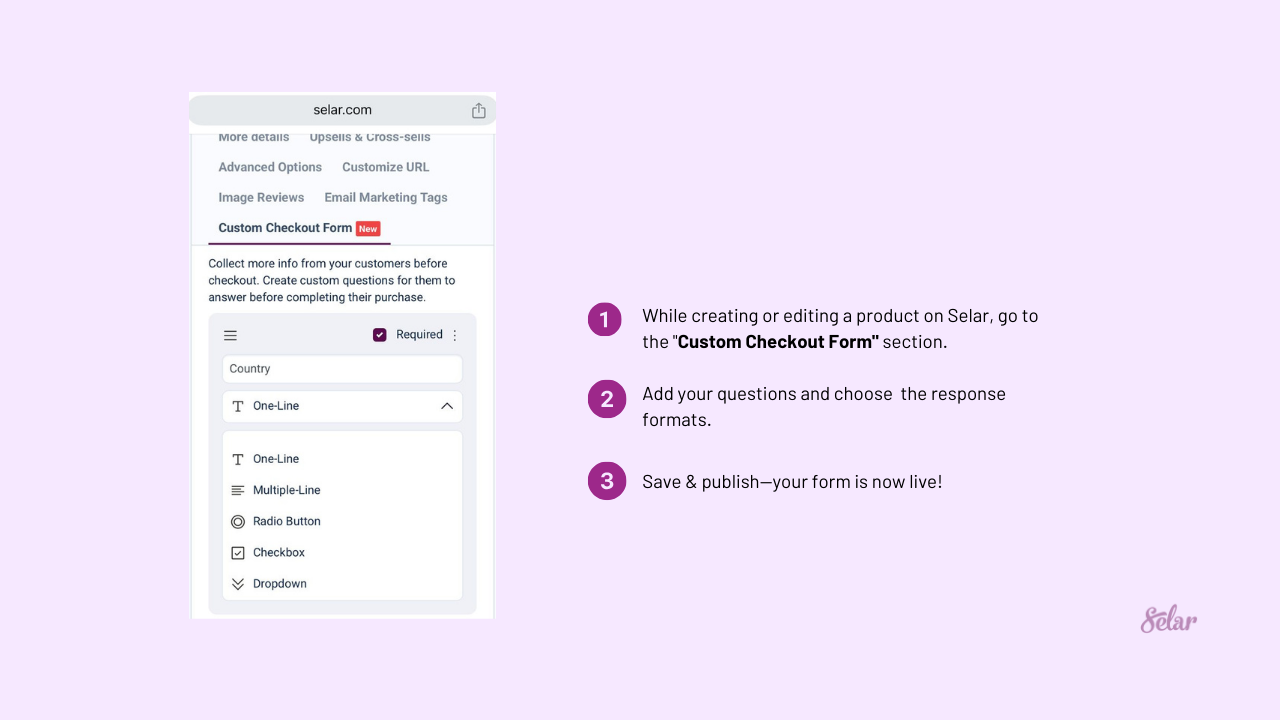
- Set up questions – When adding or editing a product, navigate to the “Custom Checkout Form” section and set the questions customers need to answer.
- Choose the response format: Select from one-line text, multiple-line text, radio buttons, checkboxes, or dropdowns.
3. Customer fills the form – Before checkout, customers complete the form as set by the creator.
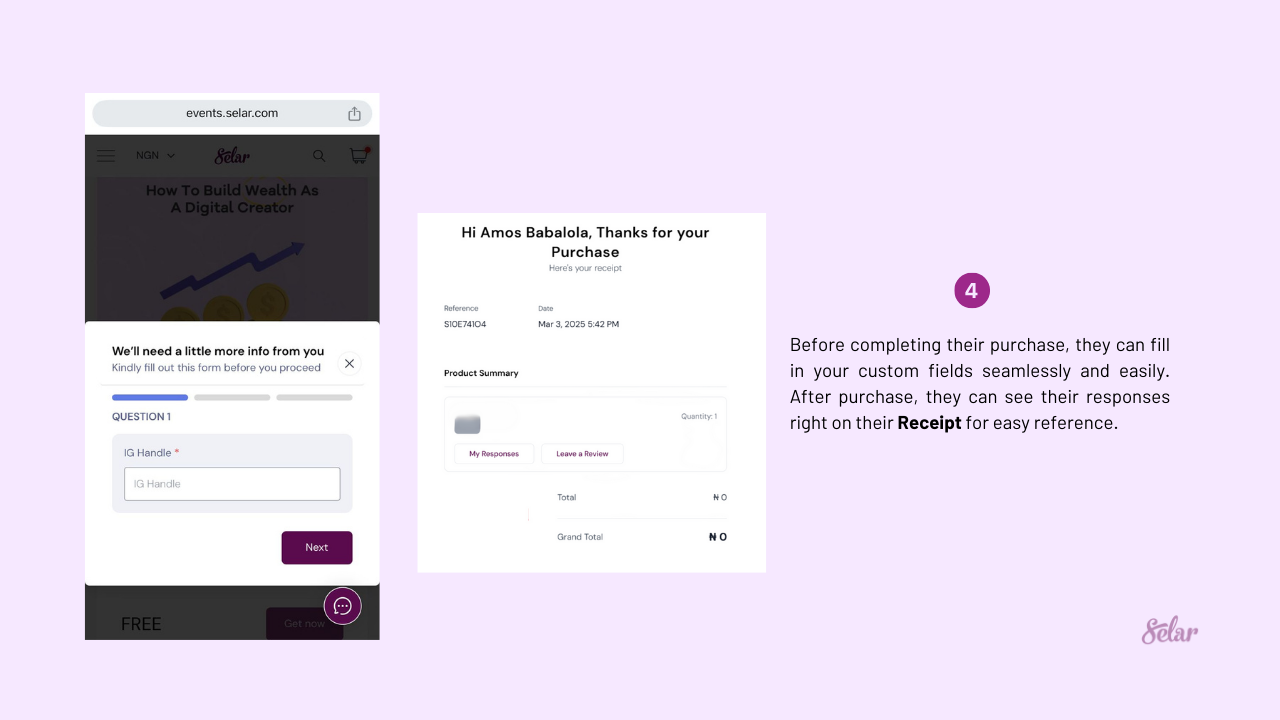
4. View and manage responses – All submitted answers are accessible on the Checkout Form Data page, where creators can review collected information.
5. Edit anytime – Need to tweak the form? You can modify your questions even after they’ve been set up.
Information to collect with the form
Now that you know how to set up the custom checkout form, here are some details you can collect with the Custom Checkout forms:
- Customer preferences and special requests – Allow customers to choose product variations, specify preferences, or make special requests to personalize their purchase experience.
- Order details and customization needs – Gather specific information about the order, such as size, color, or any customizations required before fulfillment.
- Important instructions and extra info – Provide a space for customers to share essential details, like special handling instructions or additional notes.
- Delivery details – Collect necessary shipping or delivery information, including preferred delivery dates, addresses, and any specific requirements.
You’re all set!
Head over to your Selar dashboard now and start setting up your custom checkout form.