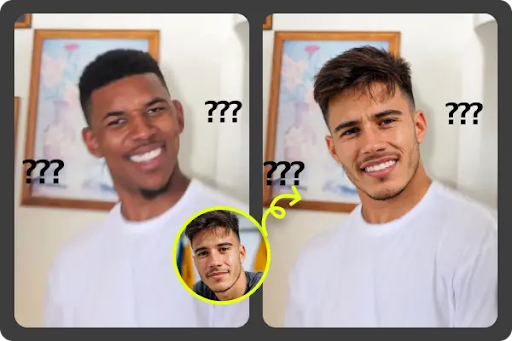
How to Swap Faces in Photos Online

Swapping faces in photos used to mean learning complex editing software, cutting around hairlines, matching skin tones, and hoping the final image didn’t look strange. Now you can do it in a browser in a few minutes, but the best results still come from choosing the right photos and checking the details before you save. The tool does the heavy work, yet your input matters more than most people expect.I’ve tested face swaps for profile mockups, family jokes, costume ideas, and social posts, and the pattern is always the same. A clean source photo and a similar target photo make the result look natural. If the lighting, angle, or expression is far off, even a good tool will struggle. For a simple browser workflow, EasyFaceSwap is a good place to start because you don’t need to install editing software or build a full design project first.
Choose the Right Photos First
Start with two clear images: the photo that has the face you want to use, and the photo where you want that face to appear. The best source face is sharp, well lit, and not blocked by sunglasses, hands, heavy shadows, or hair. A straight or slight three quarter angle usually works better than a strong side profile. If the face is tiny in the frame, crop the image closer before uploading it.
The target photo matters just as much. Look for a photo where the face area is easy to read and the head angle is close to the source photo. If one person is looking straight at the camera and the other has their chin down in deep shadow, the swap may work, but it can look pasted on. I’ve had the most natural results when both photos were taken under similar indoor light or soft outdoor light.
You don’t need perfect studio images. Phone photos work well when they’re not blurry and the face is large enough. If you’re using older photos, scan them at a decent resolution or use the clearest digital copy you have. A small file pulled from a chat app may look fine on your phone, but it often lacks the detail needed for a clean swap.
Upload Your Photos and Run the Swap
Once your photos are ready, open the browser tool and choose the face swap option. The process is usually simple: upload the source face, upload the target image, then let the tool process the swap. If you want a direct page for this task, use Photo Face Swap and follow the prompts on the screen. Keep the browser tab open while the image is processing so the upload and result don’t get interrupted.
When you upload the source image, pick the photo with the face you want to transfer. If there are multiple people in the image, some tools may ask you to select the correct face. If selection is automatic, make sure the right person is detected before moving on. This matters a lot in group photos because the tool may choose the largest or clearest face by default.
Next, upload the target photo where the new face should appear. If the target has more than one face, choose the person you want to replace if the tool gives you that option. I like to zoom in on group photos before starting, just to make sure the target person’s face is sharp enough. A face swap on a small, blurry background person rarely looks convincing.
After both images are loaded, start the swap and wait for the result. Processing time can vary based on file size, server load, and image complexity. A single portrait often finishes quickly, while a large group photo may take longer. If it fails, don’t assume the tool is broken right away. Try a smaller file, a clearer face crop, or a different browser.
Review, Refine, and Download
When the result appears, don’t download it right away. Zoom in and check the eyes, jawline, hairline, and mouth. Those areas reveal most face swap issues. A result can look good at full size but show odd blending near the cheeks or forehead when viewed closely.
Pay special attention to skin tone and lighting. A small difference is normal, especially when the two photos were taken in different places. A big mismatch, like a warm face on a cool blue scene, will stand out. If the tool gives you more than one result or lets you regenerate the swap, try again with the same images before changing anything else.
If the result looks off, the fastest fix is often changing one of the input photos. Use a source face with a closer angle or a target image with softer light. You can also crop the source face closer so the tool focuses on the right details. I’ve found that small changes in the source photo can make a larger difference than trying to edit the final image afterward.
Once you’re happy with the swap, download the finished image. Save it in the highest quality the tool offers, especially if you plan to post it or print it. If you’re making something for social media, keep a copy of the original result before adding filters, text, or stickers. That way you can go back to the clean version if your edits make the face look less natural.
Tips and Best Practices
Use face swaps for fun, creative, and clearly permitted projects. A birthday joke, a costume preview, a meme among friends, or a family photo experiment can be harmless when everyone understands the context. Problems start when people use another person’s face without permission, especially in ways that could embarrass, mislead, or harm them. If the photo includes someone else, get consent before sharing the result.
Keep your expectations realistic. Online face swap tools can produce impressive results, but they’re not magic. They work best when the source and target photos already share the same basic pose and lighting. If you try to swap a smiling face onto a serious expression, the mouth may look stretched or the cheeks may not match the target face shape.
Think about where the image will be used. A swap that looks fine in a private group chat may not hold up as a profile photo, ad image, or printed poster. Larger viewing sizes expose small flaws. For public use, zoom in, view it on another screen, and ask yourself if the image could confuse people about who was really in the photo.
Protect your privacy too. Don’t upload sensitive images, private documents, children’s photos, or anything you wouldn’t want stored or seen outside your device. Most web tools are built for convenience, not for handling highly sensitive material. If privacy is a concern, read the site’s terms and privacy details before uploading.
For better results, avoid heavy filters before the swap. Beauty filters, strong color grading, and skin smoothing can remove details the tool needs. It’s usually better to swap the face first, then apply your final style edits afterward. This keeps the face structure clearer during processing and gives you more control over the final look.
Common Mistakes and Final Thoughts
One common mistake is using photos with very different head angles. A straight face placed on a turned head often creates strange ears, jaw edges, or eye positions. The result may seem funny, but it won’t look natural. If the target person is looking left, use a source photo where the face is also turned left.
Another mistake is ignoring the background and body pose. The face may blend well, but the rest of the image can still make it feel wrong. A bright face on a dark scene, or a laughing face on a stiff formal pose, can break the illusion. The best swaps feel consistent from the forehead down to the shoulders.
People also forget to check the image after downloading. Compression, resizing, or posting to social platforms can sharpen flaws or change colors. Before sharing, open the saved file and view it at the size others will see. If it looks odd, try a fresh swap with better matched photos instead of forcing that version to work.
Face swapping online is simple when you follow the right order: choose clear matching photos, upload them carefully, review the result, then refine if needed. The tool can save you a lot of editing time, but good input and honest review make the final image better. Use it with consent, keep privacy in mind, and treat the result as a creative edit rather than proof of a real moment. With that approach, you can make swaps that are fun, polished, and far more believable.